Acoustic Guitar

This is my blog on building an acoustic guitar that my wife got me as a kit. Some of the parts came preassembled, which is cool because I have a small child and no free time. ;-)

Saturday, February 20, 2010

Bindings

Today I routed the channel on the bottom of the guitar for the rosewood bindings I got from www.stewmac.com.


I glued half the binding on using Titebond. I started with one half first so if I messed up I would not loose everything. I taped it down as opposed to wrapping the guitar and it seems to have worked great. I left it for about 6 hours.


Then I started scraping for the first time in my life. This is awesome. I got the scraper from www.rockler.com It was a kit of 3 and they are awesome!!!!

Monday, February 15, 2010

Bending iron redux

So I tilted the propane torch upright and moved the pipe higher up. I then clamped this to my work bench and all is well. This helped my issue with the propane torch blowing out. I used the flame on low.


I soaked the rosewood binding for 15 min. Next binding will be longer so the wood does not dry out so fast. I kept a spray bottle filled with water nearby to rehydrate the wood as it dried during bending. I used a wet paper towel between the wood and the hot pipe and it helped avoid scorching. I also made a jig to hold the binding in shape during cooling and drying. I reused the tops from the spool clamps for this jig. Wood was left in the jig for 24 hrs. The jig also helped me see if the bend was going well.

Bent two sides so far. I will update tomorrow with photos.

Sunday, February 14, 2010

Bending Iron

So I decided to make a bending iron to bend the rosewood bindings. See the photos below. I used 2" diameter black pipe and sanded the black coating off the pipe. I read that is smells nasty when heated if you leave the black on. I put some insulation between the flange and the wood.

I built the frame from scrap pieces of 1X4 material I had in the shop. Pine. Bernzomatic propane torch used for heating element. I put a small baffle in the pipe.


So I tried it out and learned that the Bernzomatic torches are a bitch to keep lit when on their sides. I checked out their website and it explains there that the liquid propane snuffs out the flame. I might have to change to a regulated torch, or change my angle of attack.

Saturday, February 13, 2010

Neck attached... sort of

Tonight I prepped the neck.
I started by clearing the channel for the truss rod. Making sure it was flush to the top. Next I prepped the peg head by putting a 3/8" bit in my drill press and opening the backs of the holes where the tuning machines go, so they sit flush, yet firm.

This was followed by dry fitting the neck to the body and making sure everything was in plane using a straight edge. I had to take some off the front of the neck because the straight edge was sitting a little above the guitar, which means that the neck was tilted back a little. Now every thing is in plane and ready for the fingerboard to be glued. I am probably going to us that rubber band thingy.


Also I am going to have to route the binding channels and shape the bindings before the neck is attached permanently.

Wednesday, February 10, 2010

Neck tang cut Bindings ordered

Yesterday I ordered the bindings and perfling. I settled on the Rosewood binding and the herringbone perfling. I am looking forward to completing this step.

I cut out the pocket for the neck tang. The stink part of this is that I did not have a flush trim bit that was piloted. All of the bits I have have a bearing, and the bearing and the screw are too long and would not allow me to fit in the cavity with the bit.
So I took my Dremel plunge routerbase, put in a straight cut bit and freehanded the cut. I then cleaned up with a chisel. I am getting better and better with the chisel.

This is how the www.usguitrkits.com recommended doing it:


Also received the jig for setting up the saddle.


Here are my bindings and perfiling:


Close up:

Monday, February 8, 2010

Top Repair... Arrrgh

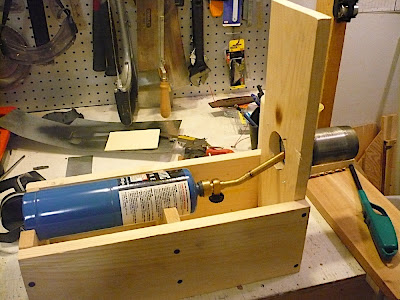
Tonight I routed the top. Awesome. Came out clean. Then as I cleaned my work bench, I knocked the guitar on the cement floor!?!?#?!?

Part of the front soundboard bottom lifted and cracked. Luckily (seems ironic to use lucky in this sentence) it was with the grain so the patch went well. I added a small super thin maple patch under the crack using titebond. looks good from above.
After the repair I knocked on the top and noticed no difference in sound or feel to knocks before I cracked the top.

Here is the crack:


barely noticeable, but there none the less.
My fat arm and huge hands can't reach that far into the sound hole, so luckily my wife's much younger sister could fit her super thin arm to the crack at the base of the guitar. She used a jack to hold the piece of maple and it came out great.


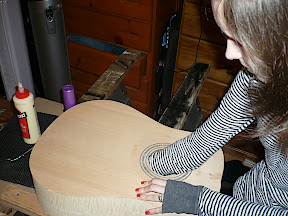
Here is the patch 2 hours later.It needs to be sanded or filed to take a little meat off, but it is less than 1/4", and it cleaned up the crack nicely.

Friday, February 5, 2010

Glue-up

Tonight I glued the top to the rest of the body.
see pictures below.
I used titebond glue and the spool clamps I had made. I used some scrap as a caul, and put it right over the shoulder brace and neck block.